. Diberdayakan oleh Blogger.

Facebook

CorelDRAW Tutorial - Vertical Stretch Zoom Text Effects

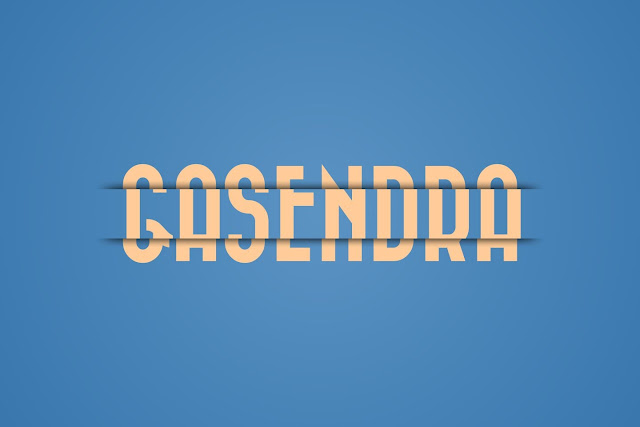
Here a simple CorelDRAW tutorial for Vertical Stretch Zoom Text Effects.

CorelDRAW Tutorial Vertical Stretch Zoom Text Effects

Step 1
Use Rectangle tool (F6) to create a rectangle for the background. On this tutorial, the Objet size: Width = 1920 px and Height = 1080 px.

Step 2
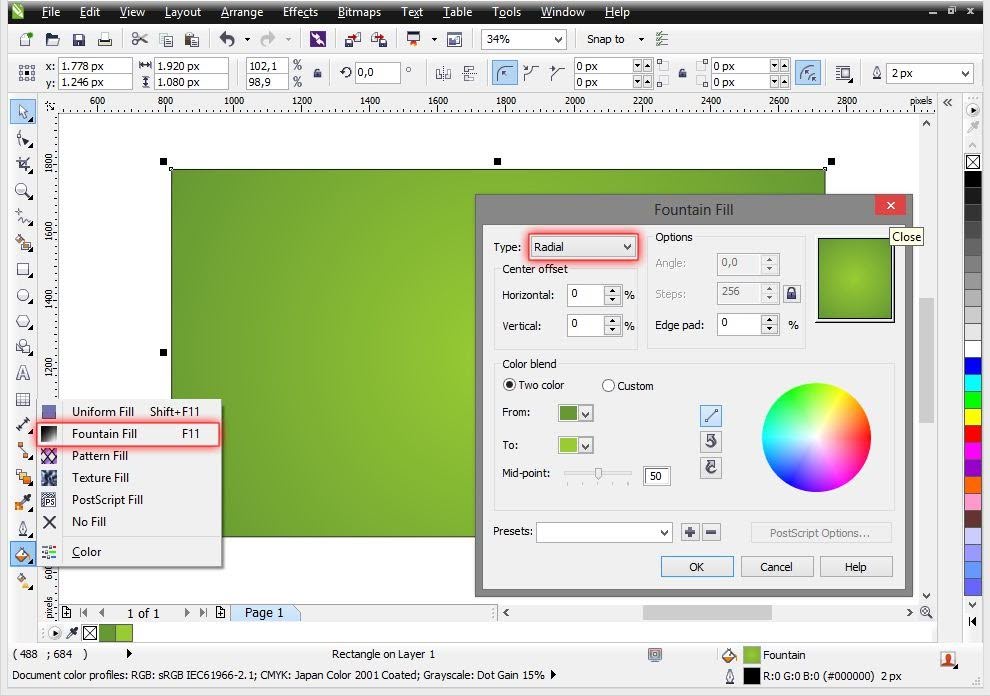
Coloring the background with your taste. Use Fountain Fill (F11) for gradient color. On the Fountain Fill windows, change Type to Radial. Then on the Color blend option change the From color darker then the To color. For example, From color is rgb(102,153,51) and To color is rgb(153,204,51).

Step 3
Add your text with Text tool (F8). Resize to taste and coloring it. I use color rgb(102,51,0).

Step 4
With Rectangle tool (F6), create a rectangle like shown below. Object size: Width = 100 px; Height = 350 px. With the rectangle object selected, copy it by pressing Ctrl+C on keyboard.

Step 5
Coloring the rectangle with black. Go to tabs Bitmaps > Convert to Bitmap.

NB: We can use Drop Shadow tool to make the shadows. But on this tutorial, we use bitmaps blur.

Step 6
An Convert To Bitmap windows will appear. Let the default option then click OK button.

Step 7
With the bitmap (black rectangle) object selected, go to tab Bitmaps > Blur > Gaussian Blur.

Step 8
A Gaussian Blur windows will appear. Change the Radius value to taste. Click the padlock icon for live preview. On this tutorial, with the size of the objects here, its enaugh with Radius = 5.0 Pixels.

Step 9
Paste (Ctrl+V) the rectangle that copied on Step 4. I change the Outline color to red to make it visible.

Step 10
Stretch vertically the rectangle (red) by increase the value of the height. For example, Object size: Height = 400 px. Select the rectangle and the blurred-black object then click Back minus front icon button.

Now we have shadows.

Step 11
Paste (Ctrl+V) again the rectangle that copied on Step 4. I change the Outline color to red to make it visible. Select the rectangle (red) and the text object then click Intersect icon button.

Now we get the Intersect result object.

Step 12
Paste (Ctrl+V) again the rectangle that copied on Step 4. I change the Outline color to red to make it visible. Select the rectangle (red) and the text object then click Back minus front icon button. 

Step 13
Next step is select the Intersect result object then increase the height. On this tutorial I increase the Height scale factor to 110 %.
Vector Tutorial Vertical Stretch Zoom Text Effects

Step 14
Repeat Steps 4-13 in another position on the text.

NB: You can repeat from Steps 11 by copying the rectangle (red) and the shadows on Step 12 then paste and move them to another position
Illustrator Tutorial Vertical Stretch Zoom Text Effects

You're DONE..!!!

Vertical Stretch

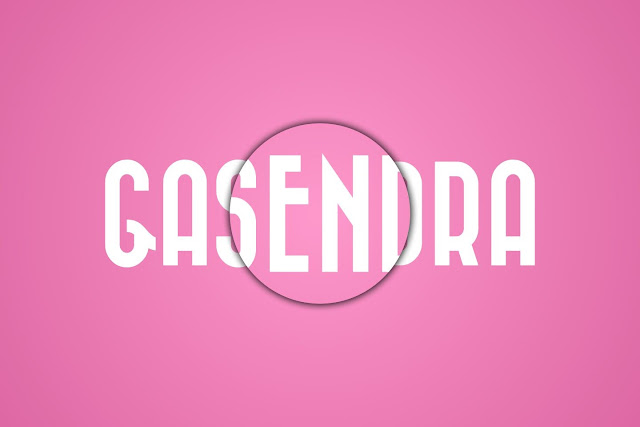
Sliding to Right Without Stretch

Vertical and Horizontal Strech


Klik untuk Versi Bahasa Indonesia

Hope you like this tutorial.
Apologize for bad tutorial, bad English, and anythingg on this tutorial.

Thanks for visiting.

CorelDRAW Tutorial - Minions Logo

This is simple tutorial about How to make Minions Logo. You may find another tutorial for this logo. But this is one of the many tutorials you can find on search engine.
CorelDraw Tutorial Minions Logo

Step 1
Create a circle with Ellipse tool (F7) and form an even circle by holding the Ctrl button. In this tutorial, the Object size : width =  200 px; and height = 200 px.

Step 2
Create a rectangle with Rectangle tool (F6) with Object size : width =  130 px; and height = 130 px. Arrange the rectangle on center of the circle by select both and press C (Align Centers Vertically) then E (Align Centers Horizontally) button on keyboard.

Step 3
Select the rectangle object then change the Angle of rotation to 45�.

Step 4
Select both then click Back minus front icon button.

Step 5
Coloring the result with black.

Step 6
Create another circle with Circle tools (F7) with Object size : width =  65 px; and height = 65 px. Align the circle to center of the first object by select both and press C (Align Centers Vertically) then E (Align Centers Horizontally) button on keyboard.

Step 7
Coloring the circle to black.

Step 8
Create a rectangle with Rectangle tool (F6) with Object size : Height = 10 px; and Width about 95 px.

Step 9
Drag the Right-Bottom corner of the rectangle to right corner of the rhombus on the circle like shown below.

Step 10
Select all object then click Weld icon button to combine all object.

Step 11
Create another rectangle with Object size: Height = 10 px.

Step 12
Drag from top side of the rectangle to botom side of previous rectngle that combine. Look picture below.

Step 13
Select both object (black object and the rectangle) then click Back minus front icon button.

You're DONE!!!

Free Download CorelDraw Vector Minions Logo


CorelDRAW Tutorial - How to Make Create Minions Logo

Cara Membuat Logo Minions

CorelDraw Tutorial - How to Create a Flat Design Rolled Sushi Icon

In this tutorial, we�ll Create a Flat Design Rolled Sushi Icon and combine them into a set of colorful icons. We�ll create a base with some simple shapes and transformations and then use it to create as many variations as we can by replacing separate details, like in a constructor.
Hope you like this tutorial.

CorelDraw Tutorial How to Create a Flat Design Rolled Sushi Icon

CREATE THE SUSHI I

Step 1
Create a rectangle with Rectangle tool (F6) and form a even rectangle by holding the Ctrl button. In this tutorial, the Object size : width =  100 px; and height = 100 px.

Step 2
Change the Angle of rotation to 45� and all value of Corner radius to 30 px with Round corner.

Step 3
Choose Contour tool.

Step 4
Use Outside contour and change the value of Contour steps to 1 and Contour offset to 50 px. I use orange color for the Outline to differentiation.

Step 5
Right click the contour object then choose Break Contour Group Apart, or just with Ctrl+K shortcut.

Step 6
Select the contour object (orange) and repeat Steps 3-5 with green Outline color.

Step 7
Coloring all with your taste. For example the green color = rgb(153,204,51) the cream color = rgb(255,255,153) and the blue color = rgb(68,88,128).

Step 8
Create an ellipse with Ellipse tool (F7). Use rgb(207,207,116) for the Outline color. Copy the ellipse on the cream area like shown below. Adjust the Angle of rotation and the Object size if needed.

Step 9
Use Pen tool to make an curve like shown below.

Step 10
Use Smart Fill tool and change the Fill color with darker green color, for example rgb(127,168,45). Then fill on the right side of the curve.

Step 11
Delete the curve and disable the Outline off the filled object.

Step 12
Select all of the object then right click and choose Group them (Ctrl+G).

Step 13
With the grouped object selected, go to tab Effects > Add Perspective.

Step 14
Create a rectangle for horizontal reference of the perspective. Select the rectangle and the grouped object. Go to Arrange > Align and Distribute > Align Centers Vertically or just press C on the keyboard.
Double click the grouped object, then the perspective control will shown (dotted rectangle). Drag the the Top-Left Perspective control point to the corner point of the rectangle like shown below.

Step 15
Do it again for the Top-Right Perspective control point.
NB: You can adjust the width size and vertical position of the reference rectangle to customize the shape of perspective.

Step 16
Delete the reference rectangle. Right click the grouped object then select Ungroup All.

Step 17
Copy (Ctrl+C) and paste (Ctrl+V) the blue object (like shown below) and make sure the copied blue object Align Centers Vertically with all.

Step 18
Create a rectangle that have same width size with the blue object.

Step 19
Select the rectangle and the bottom blue object. Then combine them by clicking the Weld icon button. We call it Sushi Body object.


Step 20
Right click the Sushi Body object then select Order > To Back Of Layer or Shift+PgDn to bring the object to back.

Step 21
Coloring the Sushi Body object darker then the blue before. For example rgb(51,68,102).

Step 22
Create a stright line like shown below with Pen tool (Hold Shift button on keyboard to lock your path while adding new anchor point for 15� increments).

Step 23
For the side shadow, use Smart Fill tool then change the Fill color more darker blue color, rgb(38,53,84). Or you can use color black then use Transparency tool. Delete the stright line and disable the Outline of the shadow object.

Step 24
Create an object like shown below with Pen tool. Coloring it with rgb(68,88,128). Then copy the object to the Sushi Body object like below.

CREATE THE SUSHI II

Step 25
Create circles with Ellipse tool (F7) and form a even circle by holding the Ctrl button like shown below. Or you may use Contour tool like Steps 3-6 with various Contour offset value.

Step 26
Then coloring them and repeat Steps 8-11 (customization).

Step 27
Repeat Steps 12-21 with various customization.

Step 28
With Rectangle tool, create rectangle, rotate, then copy like shown below. Then Group the rectangles (Ctrl+G).

Step 29
Choose Smear tool.

Step 30
Customize the Nib radius and Pressure value of Smear tool. For example, Nib radius = 422 px and Pressure = 50 for size of the grouped rectangles. Then use the Smear tool, click the grouped rectangles to active it, then drag like shown below.

Step 31
Take the smeared rectangles object like shown below. Select the smeare rectangle object and the Sushi Body object then click the Intersect icon button. Coloring the Intersect result with darker color of the Sushi Body object.

Step 32
Delete the smeared rectangles object.

Step 33
For the shadow, create a rectangle like shown below and make sure the left side of the rectangles in the center of the Sushi Body object. Select the rectangle and Sushi Body object then click Intersect icon button.

Step 34
Coloring the intersect relult with black.

Step 35
Choose Transparency tool. Change the Transparency type to Uniform then adjust the Starting transparency value enaugh. In this tutorial Starting transparency = 87.

ANOTHER FORM SUSHIS

Step 36
Create another Sushis top with combination of circles and rounded rectangles.

Step 37
Use necessary Steps above.


Step 38
With Ellipse tool and Pen tool, create object like shown below.

Step 39
Copy and coloring them like shown below. For example, the orange color is rgb(255,102,51), and the brighter is rgb(255,154,120). Group for each.

Step 40
Choose one of the sushi form. For example the sushi with blue sushi body.

Step 41
Delete any object that not needed on the top of sushi.

Step 42
Place the caviar on top of the roll and start adding more copies. Rearrange the pieces, placing the dark elements next to the light ones, creating contrast.
Add more copies, covering the top of our rolled sushi and creating a thick layer of caviar.

Step 43
Create another sushis with various shape and color. Place our rolls on the icon circles with Tutorial Logo With Long Shadows, combining the contrasting colors. Duplicate some rolls, creating pairs to make the set more rhythmic and varied.
Free Download CorelDraw Vector Flat Design Rolled Sushi Icon

Congratulation, now you have a set of Flat Design Rolled Sushi Icons.
Hope you like this tutorial.
Apologize for bad tutorial and English, hope this tutorial helpfully.

CorelDraw Tutorial - How to Create a Flat Design Rolled Sushi Icon

Bagaimana Cara membuat Gratis Download icon Sushi Logo