In this tutorial we�re going to create a stylish retro logotype and place it on a blurred background made from a photo right in Adobe Illustrator. We�ll be using some basic shapes and effects and working with Gradient Mesh to turn our photo into a defocused background. Let�s get started!
1. Create a Retro Logo From Circles
Step 1
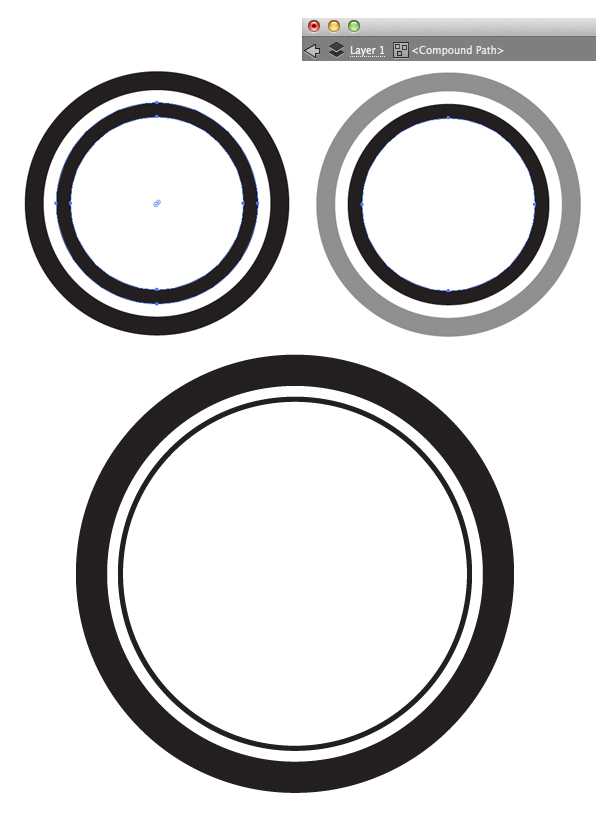
Start by taking the Ellipse Tool (L) and form an even circle by holding the Shift button. Add a smaller circle inside the first one.
Step 2
Select both created circles, click your right mouse button and choose Make Compound Path from the dropdown menu. Fill the new shape with black color.
Step 3
Add another black ring inside the first shape. You can edit the parts of the compound path separately by clicking twice on the path and thus entering the isolation mode (you will notice all other parts of your image become dimmed). Make the ring thinner by selecting its inner part with the Direct Selection Tool (A) and expanding it.
Step 4
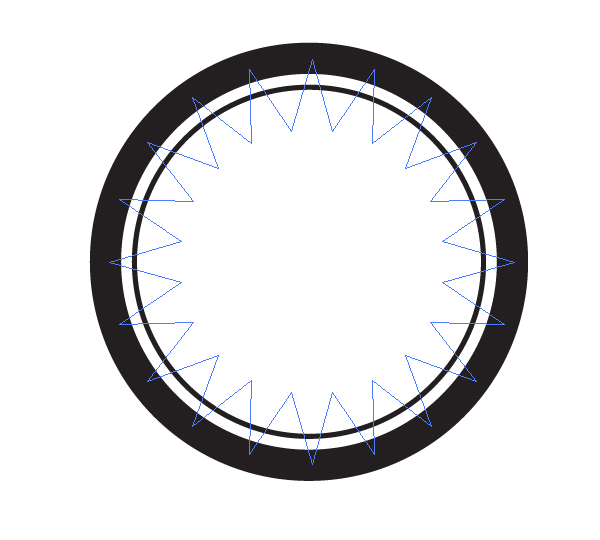
Double-click the Star Tool to call the pop-up options window and set the Points value to 20.
Hold down the Control key and drag to make the points of the star more or less sharp.
Step 5
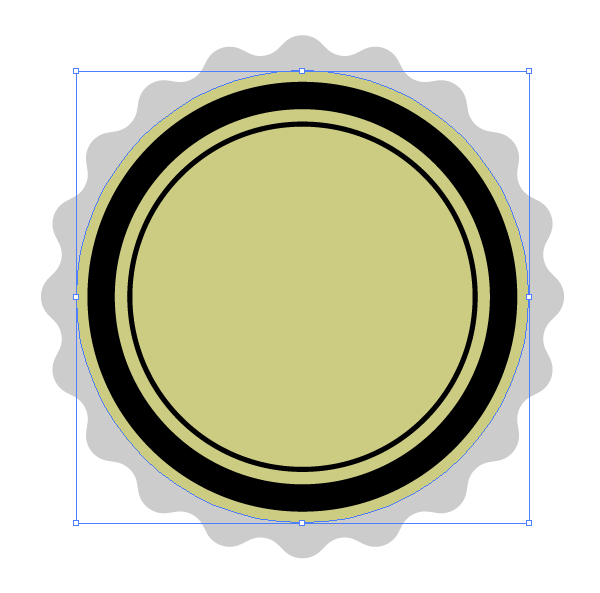
Expand the star, making it larger than the black rings and Send it to Back (Shift-Control-[), placing it beneath the other shapes.
Let�s make the shape smoother. For Adobe Illustrator CC users: select the created star, take the Direct Selection Tool (A) and you�ll notice tiny circle indicators appear next to each point of the star. Click and drag any circle to smoothen the points.
If you�re using an earlier version of Adobe Illustrator, go to Effect > Stylize > Round Corners and set the Radius value to about 30 px. Object > Expand Appearance to apply the effect.
Step 6
Form another circle, making it slightly larger than the rings.
Select both the star and the newly created circle and use the Minus Front function of the Pathfinder panel to cut out a hole.
Step 7
Add a smaller circle, putting it in the center of the other rings, and apply a 2 pt black Stroke to it, setting the Fill color to none. Go to Effect > Distort & Transform > Zig Zag and set the Size to 2 px, Ridges per Segment to 30 and Points to Smooth. Check the Preview box to make sure your shape fits the rings.
Step 8
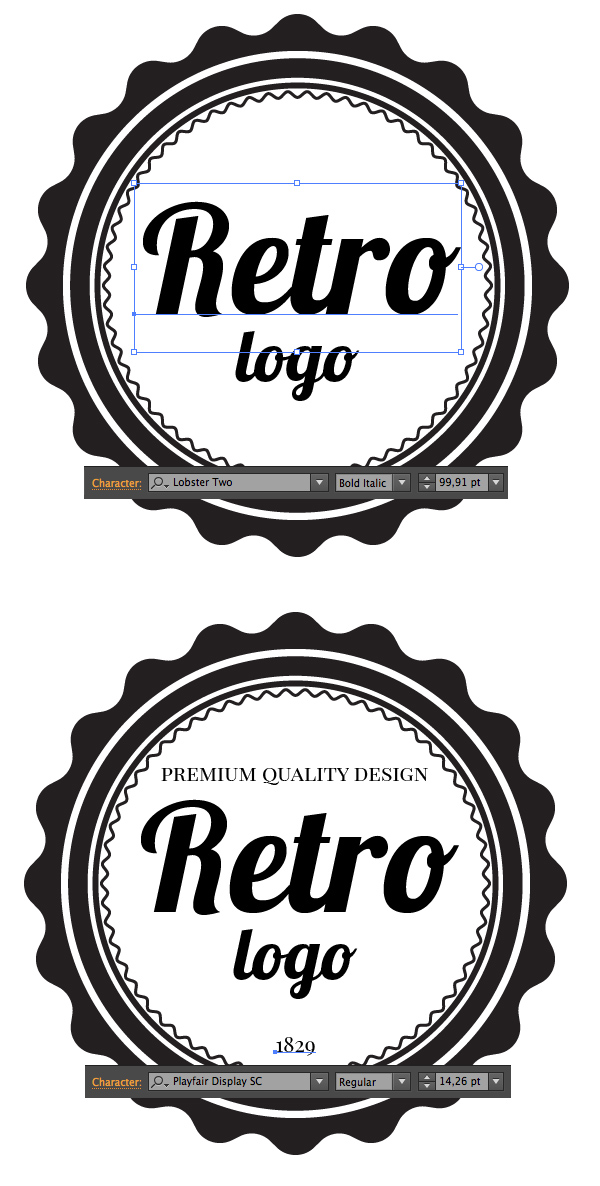
Let�s add some text to fill the blank spaces and make our logo more intricate. We'll use some well-known free fonts (Lobster Two and Playfair Display), which suit our retro style image.
Step 9
Use the Star Tool to form a small 5-pointed star. Place a row of three stars in both the upper and bottom parts of the logotype, emphasizing the text.
Step 10
Let�s edit the position of the elements to make our logo perfectly aligned. Select all the parts and click the outer curved part of our logo while holding the Alt key to make it a Key Object. This way all other objects will be aligned to the Key Object. Click the Horizontal Align Center to reposition the elements.
2. Form a Blurred Background From Your Photo
Step 1
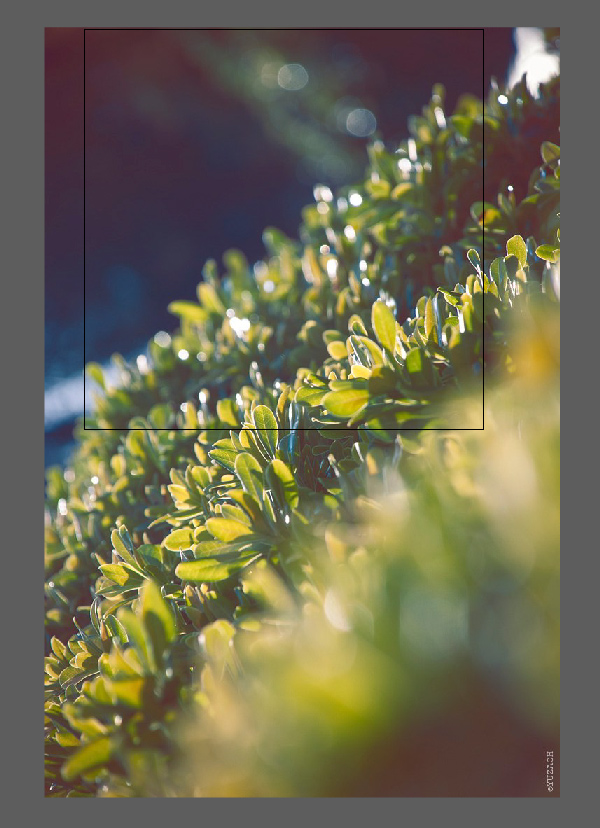
Let�s use a contrasting abstract photo, which will look nice as a background. I�ve picked this nature shot from my personal archive.
Step 2
File > Place the photo in our document. You can rotate it to find a better angle, fitting only a part of the image into the Artboard.
Step 3
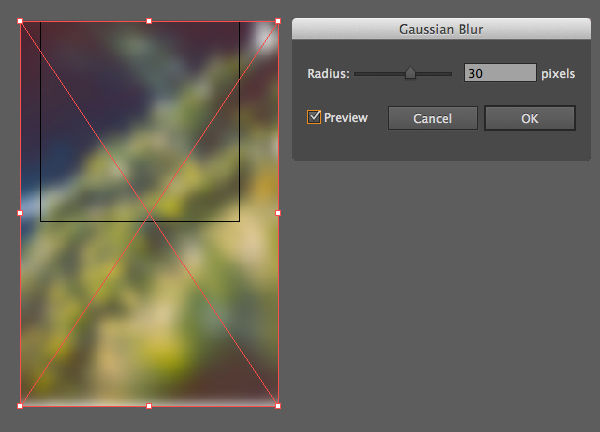
Continue by selecting our photo and move to Effect > Blur > Gaussian Blur. Set the blur Radius to 30 px, making the image defocused.
Step 4
Now we need to turn the photo into vector. For this purpose, go to Object > Create Gradient Mesh. Set the Rows value to 10 and the Columns to 15, making a grid with square cells. Don�t make the cells of the grid too small or too big in order to avoid artifacts and uneven pieces on the image after converting it to mesh.
Step 5
We need to get rid of those parts of the mesh outside the Artboard. Let�s create a rectangle the size of our Artboard (in this tutorial we have a square 600 x 600 px Artboard) and place it on top of all other objects (Shift-Control-]). Select both the created square and our mesh, click the right mouse button and apply Make Clipping Mask from the dropdown menu, thus hiding the unneeded parts inside the mask.
Step 6
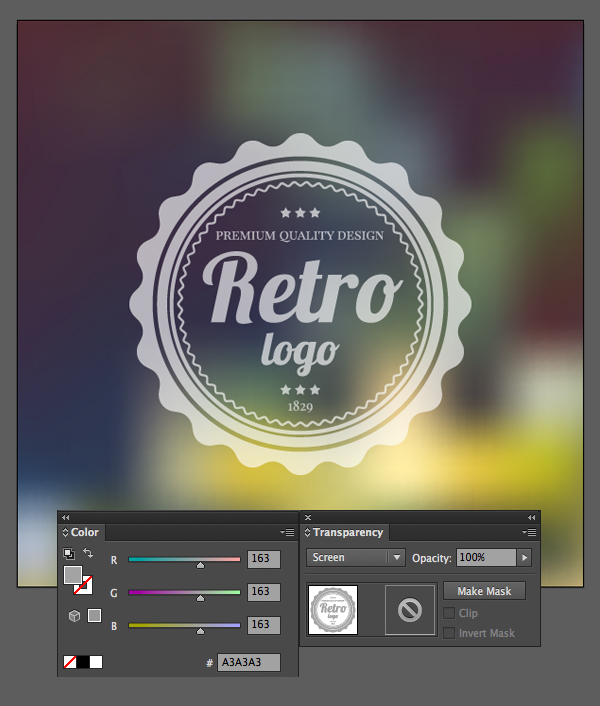
Place our logotype on the created background and fill it with grey color. Switch the Blending Mode to Screen, making the logo semi-transparent.
Congratulations! Your Stylish Retro Logotype Is Finished!
Great job! Now you can make similar logos using the same simple technique and turning your photos into gentle defocused vector backgrounds. I hope you�ve found some useful tips and tricks in this short tutorial. Stay tuned and good luck!
Go to CorelDraw Version Tutorial
Source : design.tutsplus.com
Home »
Adobe Illustrator
,
Design
,
Graphic
,
Illustrator
,
Logo
,
Tutorial
» Adobe Illustrator Tutorial - Create a Retro Logotype on a Blurred Background
Adobe Illustrator Tutorial - Create a Retro Logotype on a Blurred Background
Posted by Unknown
Posted on 23.15
with No comments











0 komentar:
Posting Komentar